Build and Export Project Collections
By Axialis Team
Collections (AXICP files) are the recommended workflow for team projects because they preserve icon choices and per-icon settings over time.
Step 1 - Create or open a collection
- Create: File -> New Icon Collection (Ctrl+N)
- Open existing AXICP: File -> Open (Ctrl+O)
Step 2 - Add icons to the collection
- From generated outputs: Collection -> Add Generated Icons to Collection (Ctrl+W)
- Or drag/drop from icon list
- Or double-click icons while collection is active
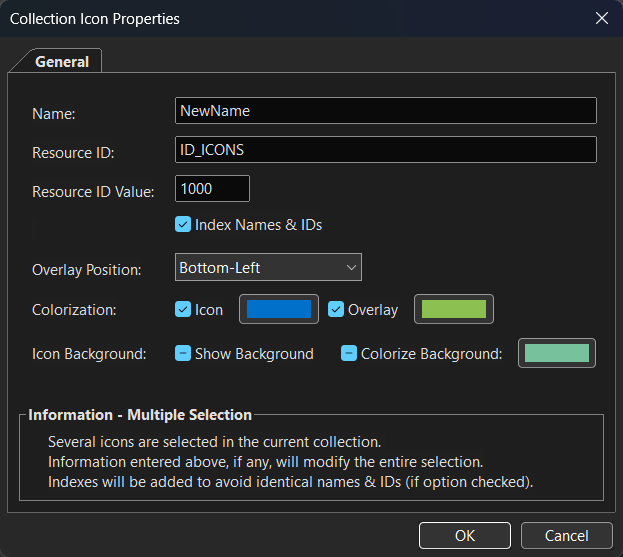
Step 3 - Normalize naming and IDs
- Select one or more collection entries.
- Open Properties (Alt+Enter).
- Set Name, Resource ID, and Resource ID Value.
- Enable Index Names & IDs for bulk uniqueness.
Step 4 - Apply overlays and colorization
Collections preserve per-icon overlay position and color settings, making repeated exports deterministic.
Step 5 - Export full project pack
- Use Collection -> Create Collection Icon Files (F4).
- Select required formats/sizes and confirm output structure.
Team best practices
- Use predictable naming conventions for icon names and IDs.
- Sort collections before export to stabilize output ordering.
- Store AXICP files under version control with project assets.