Add Overlays for Actions and States
By Axialis Team
Overlays help you represent actions like add/remove/edit and states like warning or error without redrawing base icons.
Step 1 - Select base icons and overlay symbols
- Select one or more base icons in the icon list.
- Select one or more overlays in the Overlays panel.
- Review generated combinations in the Generated Icons panel.
Step 2 - Set overlay position
- Use corner buttons in Generated Icons panel, or
- Use F5, F6, F7, F8 shortcuts depending on panel focus.
Step 3 - Adjust overlay color strategy
- Keep icon and overlay linked for monochrome output.
- Unlink colors for two-tone status icons.
- Use high-contrast overlay colors for warning/error states.
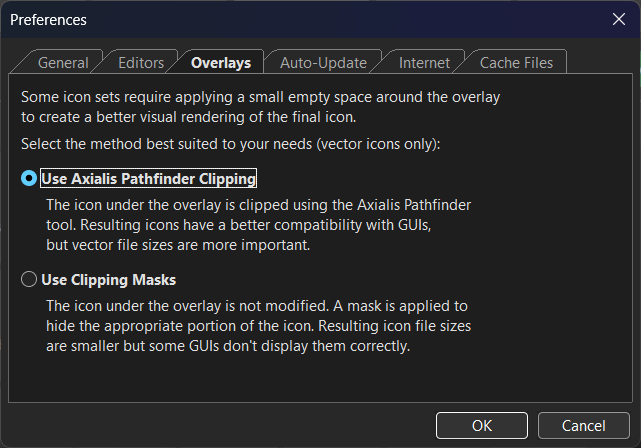
Step 4 - Choose vector clipping behavior
In Preferences -> Overlays, choose between Axialis Pathfinder clipping and clipping masks. Pathfinder clipping often improves compatibility in frameworks with limited mask handling.
Export tip
When exporting, use Overlays Separately in the Icon Colors section to preserve different status colors for overlays and base icons.